Appendix: Getting started with report-config.yaml
RepoSense allows you to easily showcase your coding portfolio by generating visualization reports of your contributions across different repositories.
This guide will help you set up your first RepoSense report using the report-config.yaml file.
What is report-config.yaml?
The report-config.yaml file is a simple configuration file that lets you define which repositories you want to include in your RepoSense report in more detail compared to the CLI flags.
It's designed to be user-friendly, especially for beginners who want to quickly set up a code portfolio without dealing with complex configurations.
For more sophisticated use cases that require additional flexibility, RepoSense's CSV configuration files offer an alternative configuration approach with expanded capabilities.
Quick Start Guide
Step 1: Create a report-config.yaml file
Create a new file named report-config.yaml in your project directory with the following basic structure:
title: "Your Portfolio Title"
repos:
  - repo: "https://github.com/repo/yourrepo.git"
    branches:
      - branch: main
        blurb: "Short description of this project"
        authors:
          - author-git-host-id: Your username on GitHub, GitLab or Bitbucket
            author-display-name: Your display name
            author-git-author-name:
              - Author Name Of Your Git Configuration
            author-emails:
              - emails-of-your-commits@email.com
              - emails-of-your-git-configuration@email.com
The title field controls the browser tab text (the HTML <title> element). To customize the description that appears at the top of the dashboard itself, provide an intro.md file as described here.
The author-display-name, author-git-author-name and author-emails fields are optional.
However, users are encouraged to add their Git author name author-git-author-name and emails author-emails in their Git configuration related to their commits so that
the commits can be successfully captured.
Step 2: Add your repositories
You can add multiple repositories to showcase different projects. Here's an example:
title: "John Doe's Code Portfolio"
repos:
  - repo: https://github.com/john/ip.git
    branches:
      - branch: master
        blurb: "Individual Project - Task Manager Application"
        authors:
          - author-git-host-id: johnDoe
            author-display-name: John Doe

  - repo: https://github.com/john/tp.git
    branches:
      - branch: master
        blurb: "Team Project - Event Management System"
        authors:
          - author-git-host-id: johnDoe
            author-display-name: John Doe
Step 3: Generate your report
To run RepoSense with report-config.yaml:
- Create a
configfolder in the same directory as the RepoSense.jar file. - Add your
report-config.yamlto theconfigfolder. - Run the command:
java -jar RepoSense.jar
Please note that the above command will only analyse your commits one month before the current date. If you would like to
specify the period for report generation, you can use the --since and --until flags.
java -jar RepoSense.jar --since START_DATE --until END_DATE
Additionally, you can add a --portfolio flag to generate a more optimized view of your report.
That's it! RepoSense will analyze the repositories you specified and generate a report that visualizes your contributions.
Example Configuration
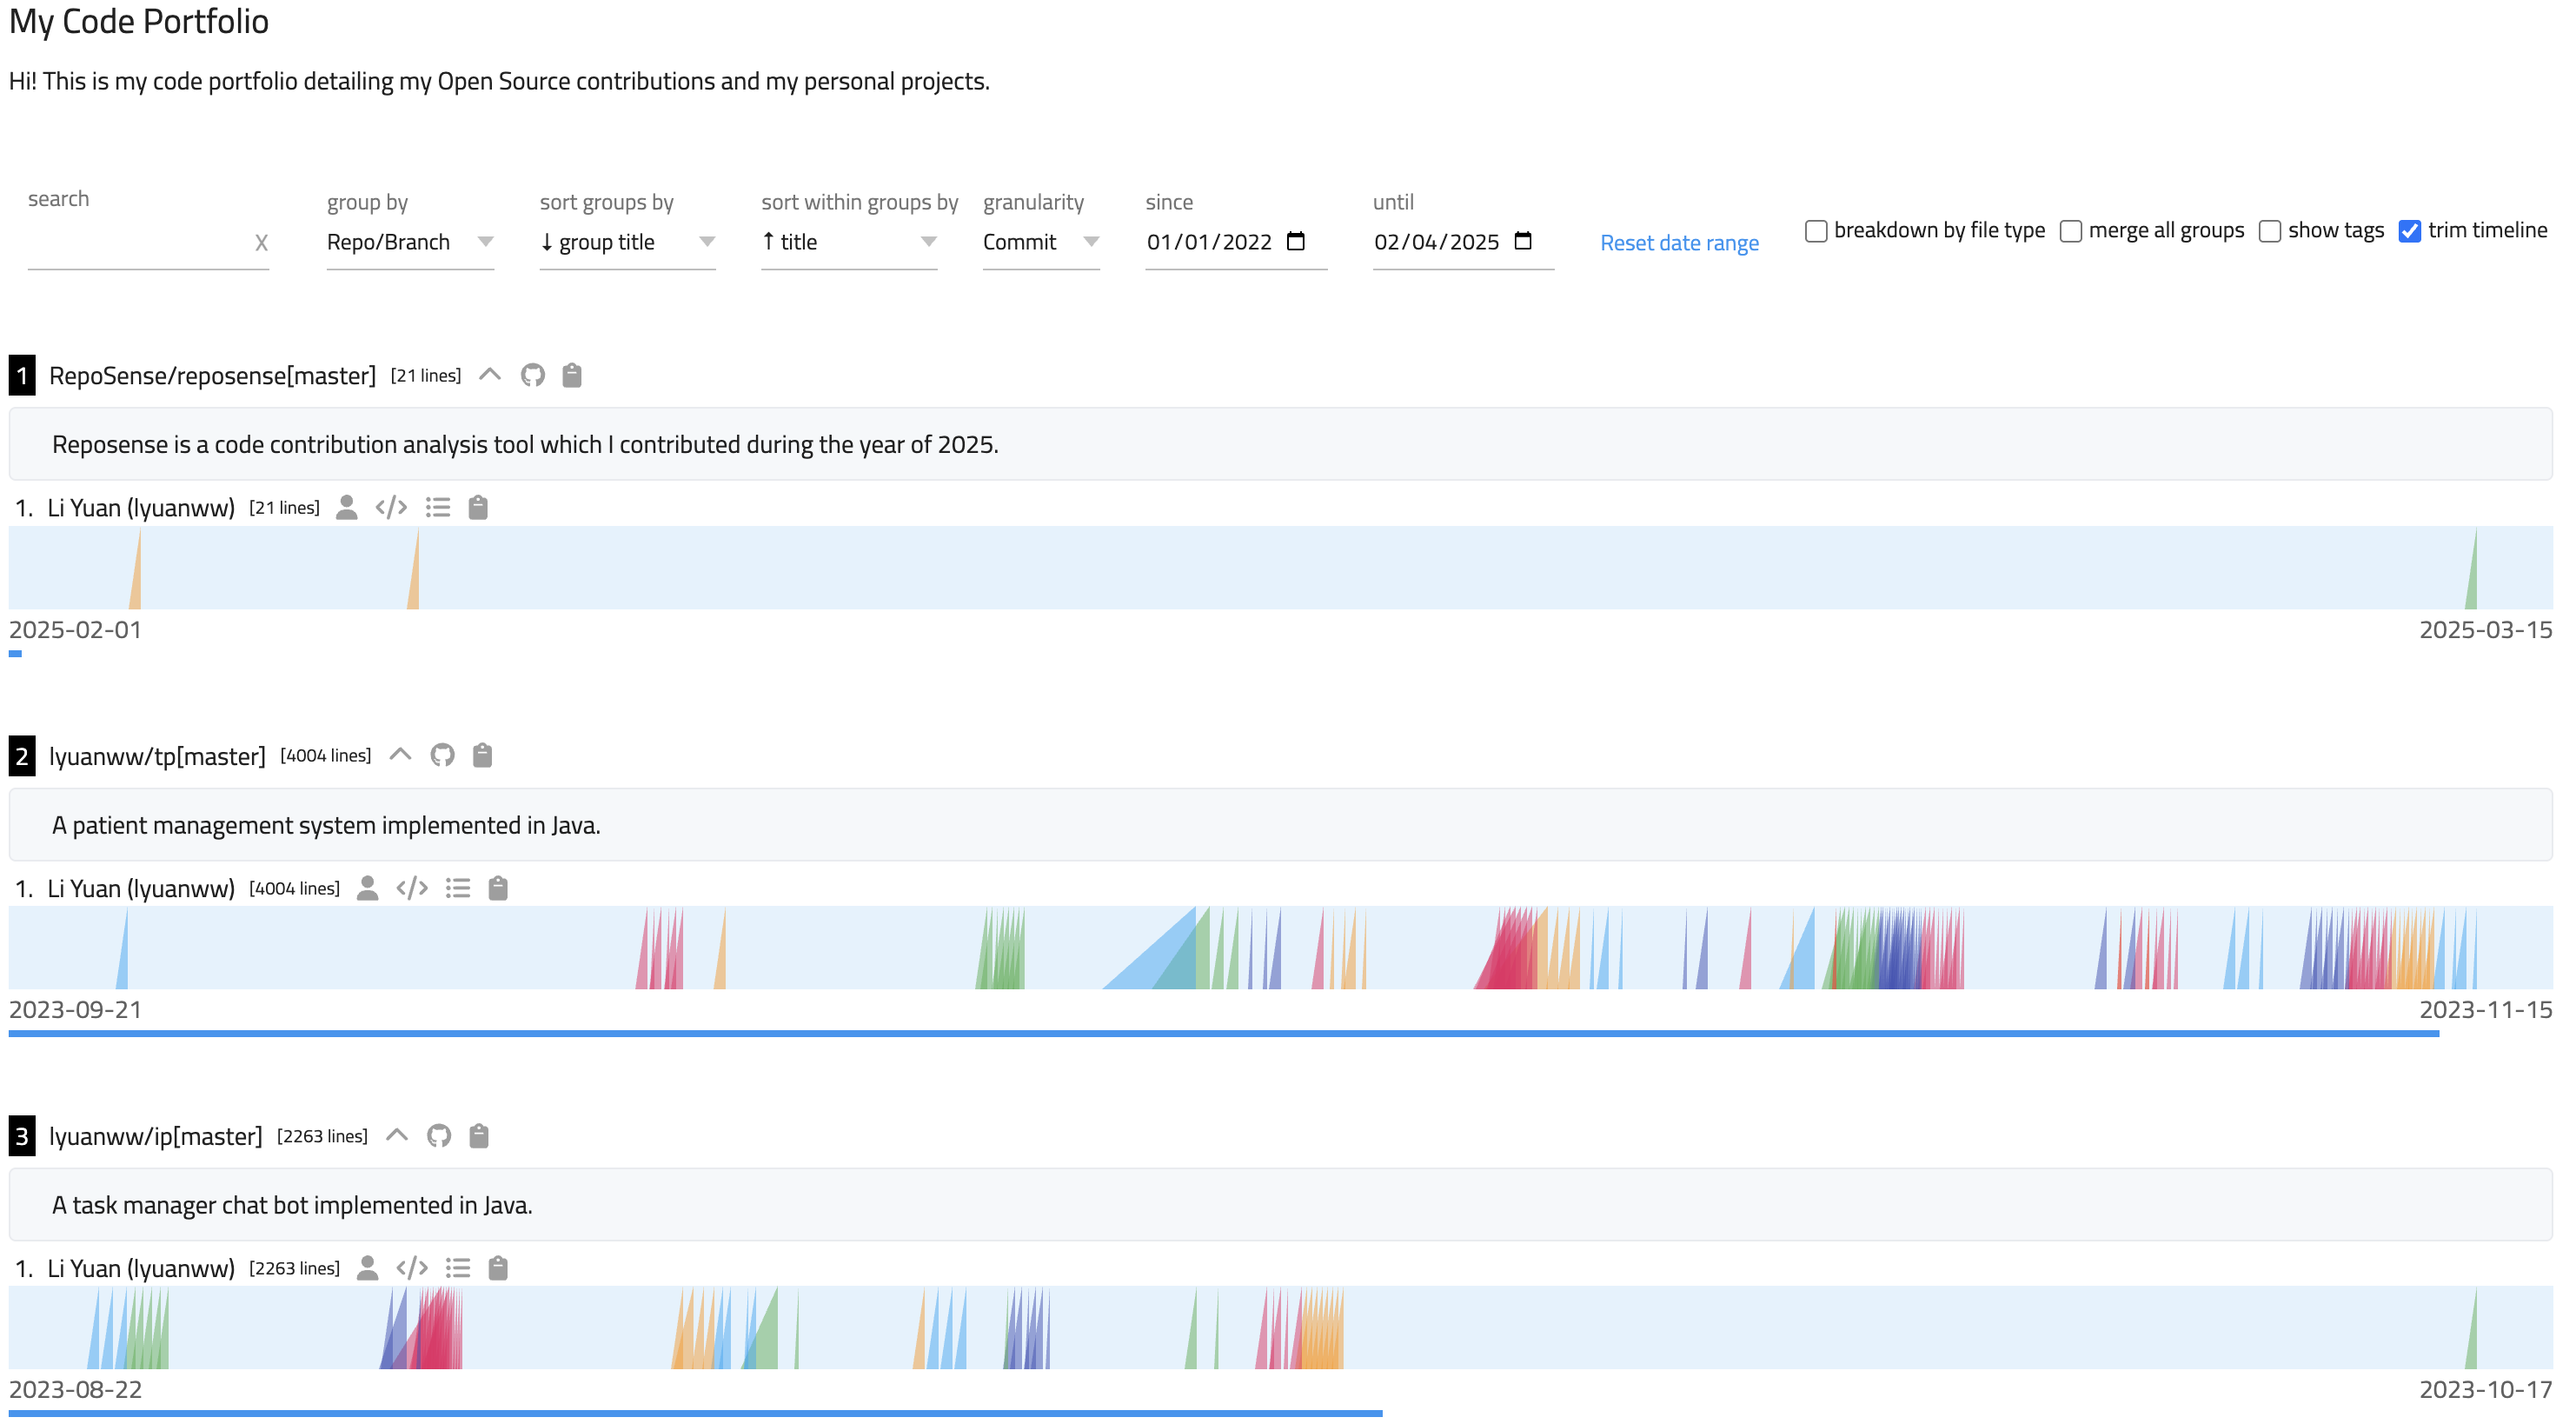
Here's a sample report-config.yaml file for a student showcasing their work across several projects:
title: My Code Portfolio
repos:
  - repo: https://github.com/RepoSense/reposense.git
    groups:
      - group-name: code
        globs:
          - "**.java"
    branches:
      - branch: master
        blurb: "Reposense is a code contribution analysis tool which I contributed."
        authors:
          - author-git-host-id: lyuanww
            author-display-name: Li Yuan
            author-emails:
              - user@gmail.com
              - e0123456@u.nus.edu
  - repo: https://github.com/lyuanww/ip.git
    groups:
      - group-name: code
        globs:
          - "**.java"
    branches:
      - branch: master
        blurb: "A task manager chat bot implemented in Java."
        authors:
          - author-git-host-id: lyuanww
            author-display-name: Li Yuan
            author-emails:
              - user@gmail.com
              - e0123456@u.nus.edu
  - repo: https://github.com/lyuanww/tp.git
    groups:
      - group-name: code
        globs:
          - "**.java"
    branches:
      - branch: master
        blurb: "A patient management system implemented in Java."
        authors:
          - author-git-host-id: lyuanww
            author-display-name: Li Yuan
            author-emails:
              - user@gmail.com
              - e0123456@u.nus.edu
Sample report generated
Further Customizing Your Report
Optionally, you can provide more detailed descriptions to your report such as an introduction at the top of your dashboard or explanatory blurbs for each repository. Please refer to this section.
Advanced Report Configuration
For users who need more advanced configuration options, report-config.yaml offers many additional features beyond the basic setup. The following section explains the complete syntax and capabilities.
Complete report-config.yaml Example
title: RepoSense Report
repos:
  - repo: https://github.com/reposense/publish-RepoSense.git
    groups:
      - group-name: code
        globs:
          - "**.py"
      - group-name: tests
        globs:
          - "src/test**"
      - group-name: docs
        globs:
          - "docs**"
          - "**.adoc"
          - "**.md"
    branches:
      - branch: master
        blurb: "My project"
        since: 10/10/2024 12:30:30
        until: 1/1/2025
        authors:
          - author-git-host-id: jedkohjk
            author-display-name: jedkohjk
            author-git-author-name: jedkohjk
            author-emails:
              - email1@example.com
              - email2@example.com
        ignore-authors-list:
          - bot
        ignore-glob-list:
          - "**.in"
        file-size-limit: 2000000
Field Descriptions
Note: All fields are optional unless specified otherwise.
Top-Level Fields
title: Sets the title of your generated report, which appears as the title of the deployed dashboard.- Default: "RepoSense Report".
repos: A list of repositories to include in your analysis..- This field is an array, so you can include multiple repositories.
Repository-Level Fields
For each repository in the repos list, you can specify:
repomandatory : The URL to the repository you want to analyze.- Example:
https://github.com/RepoSense/reposense.git
- Example:
groups: Allows you to define custom groupings of files for more organized analysis.- This is useful for separating code files, test files, documentation, etc.
- Each group has:
group-namemandatory : A name for the group (e.g., "code", "tests", "docs").globsmandatory : File patterns to include in this group using glob format.
branchesmandatory : The branches you want to analyze in the repository.- For each branch, you specify:
branch: The name of the branch (e.g., "master", "main", "develop").- Default: The default branch of the repository.
blurb: A short description of the branch that appears in the report.- For more detailed descriptions, you can use a separate
blurbs.mdfile.
- For more detailed descriptions, you can use a separate
since: Start date of commits to include in the analysis. Accepted formats:- Date format:
dd/MM/yyyy
- Date and time formats:
dd/MM/yyyy HH:mmdd/MM/yyyy HH:mm:ss(e.g.,05/12/2025 14:32:10)
- Date format:
until: End date of commits to include in the analysis. Accepted formats:- Date format:
dd/MM/yyyy
- Date and time formats:
dd/MM/yyyy HH:mmdd/MM/yyyy HH:mm:ss(e.g.,05/12/2025 14:32:10)
- Date format:
- For each branch, you specify:
Behavior of since/until in report-config.yaml vs. --since/--until in CLI
- If
sincedate is specified in bothreport-config.yamland CLI, the config date takes priority for that repository. The same rule applies to theuntildate. - Config date range must fall within the CLI date range; otherwise the program exits with an error.
- Example with CLI
--since= 10/10/2024,--until= 20/10/2024:- Valid config dates:
since= 11/10/2024,until= 19/10/2024 - Invalid config dates:
since= 9/10/2024,until= 21/10/2024
- Valid config dates:
- Example with CLI
- If only one CLI flag is provided, the missing CLI value does not restrict config dates.
- If config dates are missing, CLI values are used.
- If CLI values are missing, then config dates will be used.
- If both CLI values and config provide dates, the config dates are used. However, when both CLI --since and --until flags are provided, each config-provided date must fall within the CLI flag provided range, or else RepoSense throws an error.
- If neither CLI values nor config provide dates, RepoSense will analyze commits from one month before the current date until the current date by default.
Author Configuration
Within each branch, you can specify:
authors: A list of authors whose contributions you want to track. If none specified, all authors will be shown.- For each author:
author-git-host-idmandatory : The GitHub username of the author.author-display-name: The name to display in the report (can be different from the GitHub username).author-git-author-name: The name used in Git commits.author-emails: A list of email addresses associated with the author's commits.
- For each author:
Filtering Options
ignore-authors-list: Authors to exclude from the analysis.- Specified by their Git Author Name.
- Useful for excluding bots or automated commit accounts.
ignore-glob-list: Files or directories to exclude from analysis.- Uses the glob format.
- Example:
"**.in"excludes all files with the ".in" extension.
file-size-limit: Maximum file size (in bytes) for analysis.- Files larger than this limit will be ignored.
- Overrides the default file size limit.