Appendix: RepoSense with Netlify
Note that Netlify has a low limit for free tier users (only 300 build minutes per month as at June 2020 -- a single report generation can take 2-3 build minutes, longer if your report includes many/big repositories). Due to this, we will not be supporting this method going forward.
Setting up
Step 1 Fork the publish-RepoSense repository using this link. Optionally, you can rename the fork to match your RepoSense report e.g., project-code-dashboard.
Step 2 Set up Netlify for your fork as described in this guide.
You don't need to follow Step 5: Configure Your Settings as we have provided you with a self-configured build script:
- Ensure that the following
netlify.tomlis in your main repo:
[build]
 command = """
 wget https://download.java.net/java/ga/jdk11/openjdk-11_linux-x64_bin.tar.gz &&
 tar -xvzf openjdk-11_linux-x64_bin.tar.gz &&
 mv jdk-11 ~/openjdk11 &&
 export JAVA_HOME=$HOME/openjdk11 &&
 export PATH=$JAVA_HOME/bin:$PATH &&
 pip install requests && ./run.sh
 """

 publish = "./reposense-report"
 base = "./"
After Netlify finishes building the site, you should be able to see a dummy report at the URL of your Netlify site.
Step 3 Generate the report you want by updating the settings in your fork.
- Go to the
run.shfile of your fork (on GitHub). - Update the last line (i.e., the command for running RepoSense) to match the report you want to generate:
java -jar RepoSense.jar --repos FULL_REPO_URL(assuming you want to generate a default report for just one repo)
e.g.,java -jar RepoSense.jar --repos https://github.com/reposense/RepoSense.git(note the .git at the end of the repo URL) - Commit the file. This will trigger Netlify to rebuild the report.
- Go to the URL of your Netlify site to see the updated RepoSense report (it might take about 2-5 minutes for Netlify to generate the report).
PR previews
After setting up Netlify for your repo containing RepoSense settings, when a PR comes in to that repo to update any setting, you can scroll down the PR page and in All checks have passed, click on the Details beside deploy/netlify — Deploy preview ready! to see a preview of the report as per the changes in the PR.

Updating the report
Manual: Netlify UI has a way for you to trigger a build, using which you can cause the report to be updated.
Automated: Netlify's can be set up to update the report whenever a target repo of your report is updated, provided you are able to update the target repos in a certain way.
Click on Settings in the top, choose Build & deploy from the left panel and scroll to Build hooks.
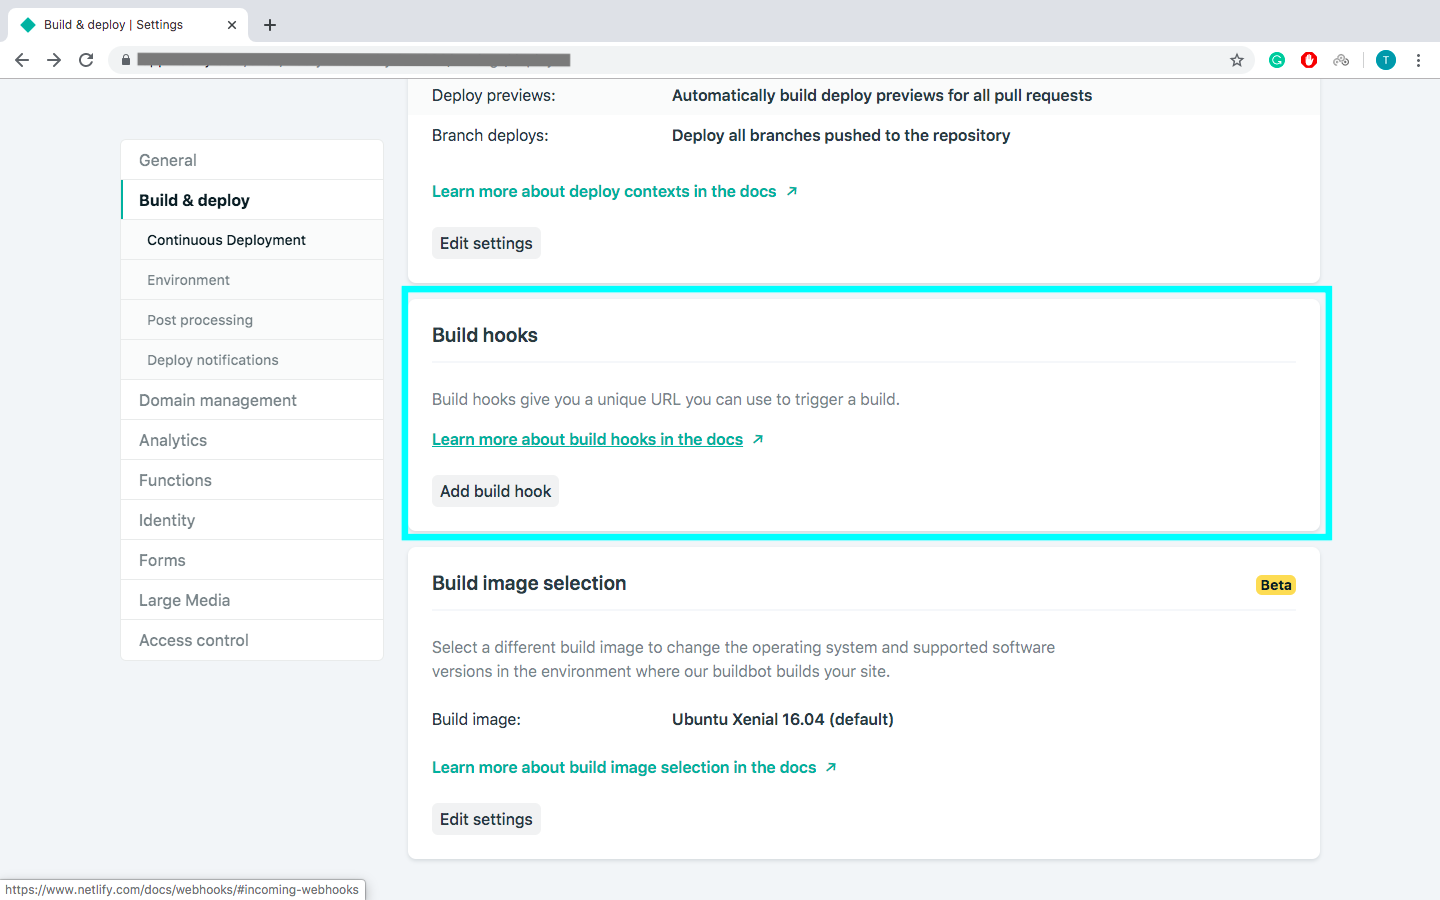
Click Add build hook, give your webhook a name, and choose the
masterbranch to build. A Netlify URL will be generated.Go to your target repository (the repository you want to analyze) and click on Settings.
Select Webhooks on left panel and click on Add webhook.
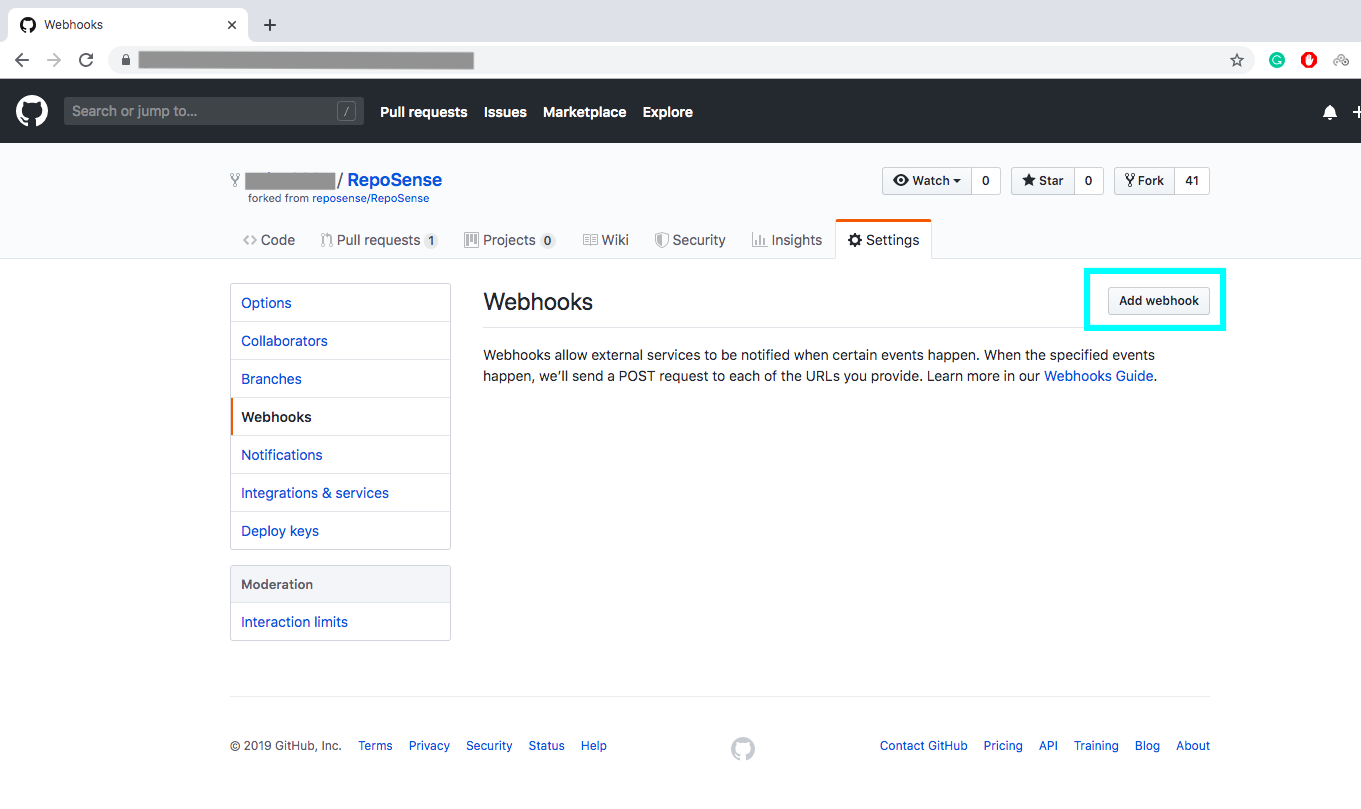
Copy the Netlify URL and paste it in the URL form field.
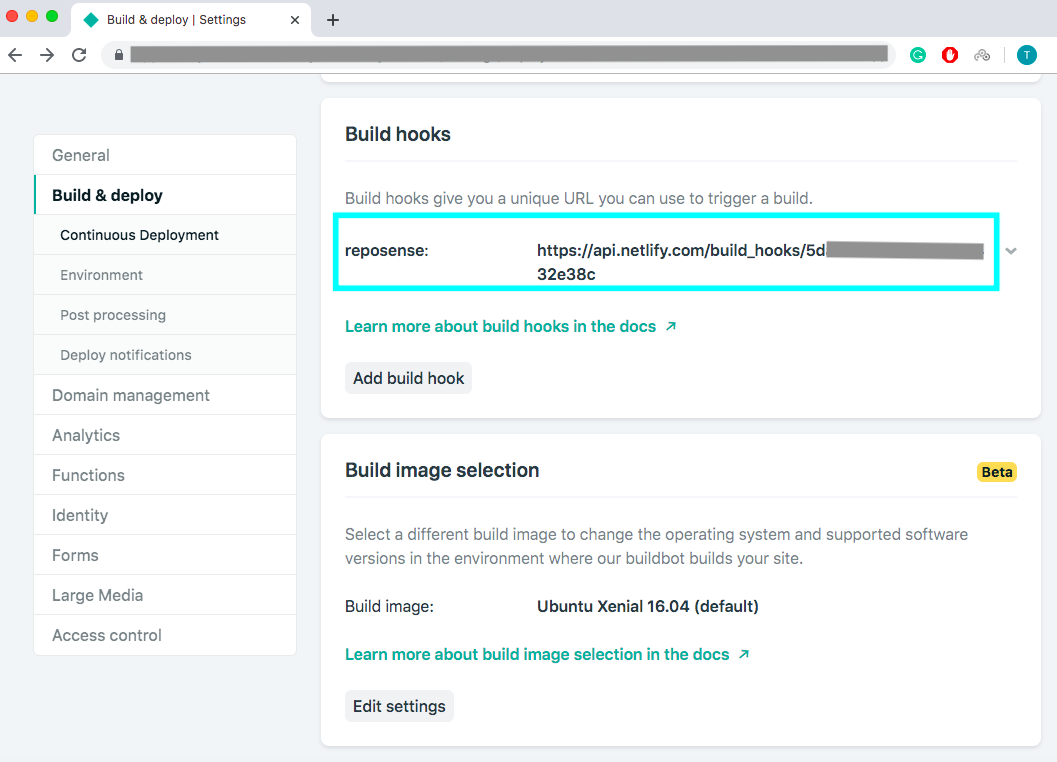
Note: Although the build url is not that secretive, it should be kept safe to prevent any misuse.
Select application.json as content type.
Select Let me select individual events and based on your requirements check the checkboxes.
Leave the Active checkbox checked.
Click on Add webhook to save the webhook and add it.